I previously covered several different hardware builds for building your own Minecraft server. Martin, a good friend of mine, decided to go with the "Premium Mini-ITX Build" I had outlined. He is the person I had mentioned who introduced me to Minecraft to begin with. Martin and a few others have been working together on a very impressive Minecraft world. Especially for creative purposes, Minecraft becomes much more fun when you can all work together on amazing creations.
Hardware
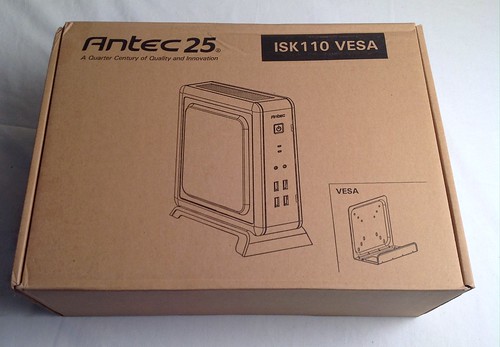
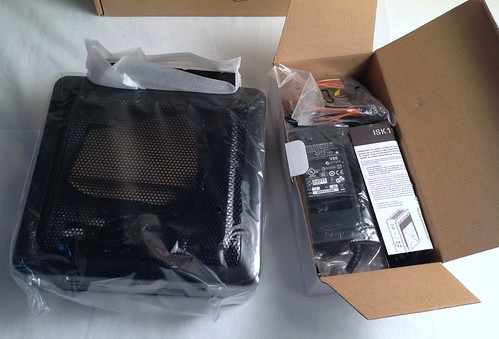
As I covered in the previous article, the Antec ISK110-VESA Mini-ITX case makes an amazing little case for a Mini-ITX system. Here is the unboxing of the case.


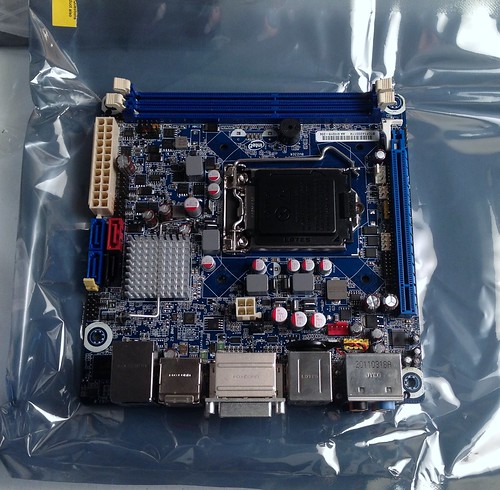
Next in line is the Intel DH67CF Mini-ITX motherboard.
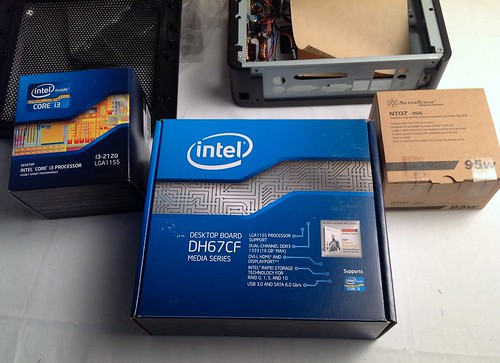
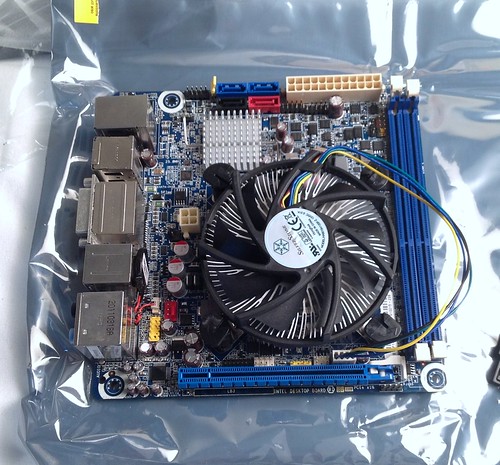
The Intel Core i3 2120 processor then gets installed on the motherboard.

For cooling the processor, we picked the excellent SilverStone NT07-1156 CPU Cooler. You can see the underside of the cooler with its copper plate and then the cooler installed.

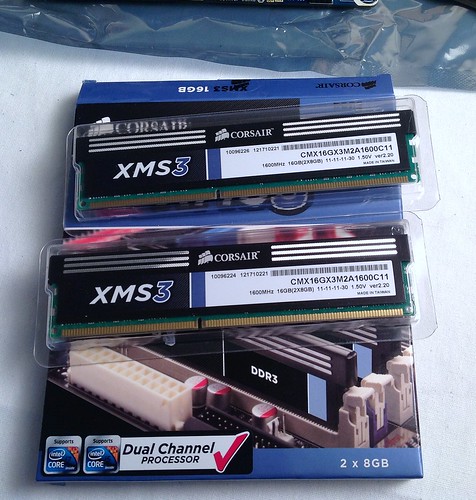
Next comes the 16GB Corsair XMS3 1600MHz DDR3 memory kit of two 8GB modules for a total of 16GB.
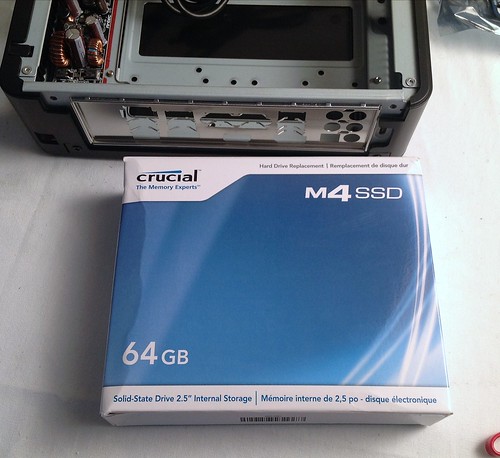
It's easier to install the SSD before installing the motherboard into the case. Here is the 64GB Crucial M4 SSD.

Here is the SSD installed in its bracket. I ended up rotating the drive bracket 180 degress so the SATA and SATA power cable reaches. On the previous ISK110-VESA case I ordered, it was already flipped. I'm not sure why this one was different but it was easily fixed.
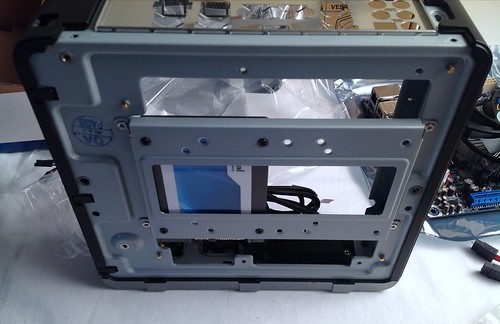

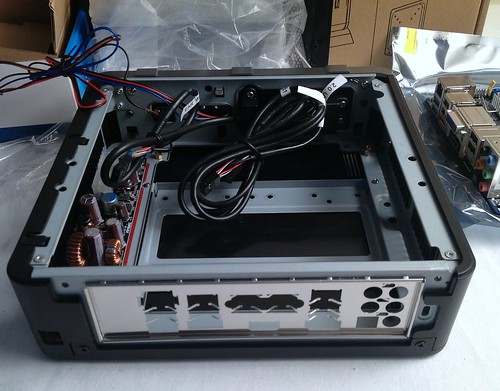
Here is the motherboard mounted in the case. This is before connecting all the cables.
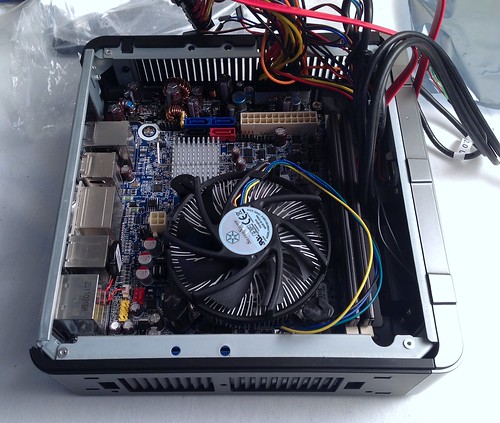
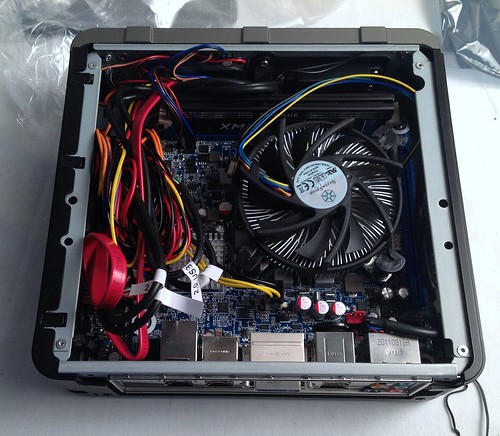
There are a lot of cables to arrange but they can be squeezed into the other side of the case away from the CPU cooler.
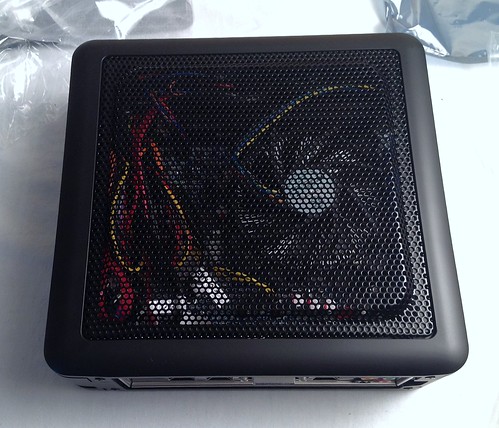
Finally with the case cover installed.
Here's the final rear I/O panel installed in the case.

All of the pictures of the build and a few I didn't use are available in their own Flickr set.
Software: Ubuntu Server and Java
For the software end, I recommend going with Ubuntu 12.04 LTS Server 64-bit. I used essentially all the defaults including automatic partitioning of the SSD with LVM and then selected only "OpenSSH Server" in the software selections. Once the install was done, I logged in with the user I had created, and did:
    $ sudo su -
    # apt-get update
    # apt-get upgrade
    # apt-get install linux-server linux-server-headers
These commands elevated my privileges to root, updated the cached software information, actually did the software upgrade, and finally also updated the kernel. It's best to just get all of this done right away so you start from a fully updated install.
I also then put a couple of ssh public keys in .ssh/authorized_keys inside /root. This allows login as root even though no password is configured for the root account.
In order to actually run Minecraft, you will need a Java Runtime Environment. Although openjdk is easily installable and apparently Minecraft will run under it, I have had great success with Sun's (now Oracle's) JRE and decided to go there straight away. You can download it from Java.com. I grabbed the Linux x64 version which is a gzipped tar archive. The archive was called jre-7u5-linux-x64.tar.gz.
    # mv jre-7u5-linux-x64.tar.gz /opt/
    # cd /opt
    # tar zxvf jre-7u5-linux-x64.tar.gz
This ended up with the following in /opt:
    drwxr-xr-x  3 root root     4096 Jun 13 20:11 .
    drwxr-xr-x 23 root root     4096 Jun 13 20:06 ..
    drwxr-xr-x  6 uucp  143     4096 May 15 17:38 jre1.7.0_05
    -rw-r--r--  1 root root 32876408 Jun 13 20:09 jre-7u5-linux-x64.tar.gz
I added a symbolic link to make things easier in the future. I then also added a symbolic link for the java binary itself.
    # cd /opt
    # ln -s jre1.7.0_05 java
    # ln -s /opt/java/bin/java /usr/bin/java
Software: Minecraft
Now that Ubuntu Server is installed and Java is in the right place, it's time for the Minecraft server software install. While there is a minecraft_server.jar available, we are going to use an excellent alternative server that supports much more customizability.
Two major third party Minecraft servers exist. The two are CanaryMod and CraftBukkit. There are others out there too but these are the most common. I initially tried out CanaryMod in a VM to see how I liked it. It seemed nice but one of the important aspects I was looking at was the ability to have a variety of plugins to control what can and cannot be edited in the world. It was this quest that brought me to CraftBukkit which seems to have more options in this regard.
I simply went and downloaded build #2222 of CraftBukkit which is also known as 1.2.5-R4.0. I would go with whichever build is the most recent recommended build. The 1.2.5 in the version number corresponds to Minecraft version 1.2.5 and the R4.0 is incremented whenever additional changes are added to the current version of CraftBukkit.
The download page provides an easy and simple already-created wget link you can copy and use on the server.
wget "http://dl.bukkit.org/downloads/craftbukkit/get/01149_1.2.5-R4.0/craftbukkit.jar" -O "craftbukkit.jar"
After downloading craftbukkit.jar, it's simply a matter of launching it from the proper directory. In this case, I created a directory in /root simply called minecraft.
    # mkdir minecraft
    # mv craftbukkit.jar minecraft/
    # cd minecraft
At this point, I created a shell script entitled mc.sh which is how I usually launch a Minecraft server. Use a text editor of your choice but I personally prefer vim. Here is what mc.sh looks like.
    #!/bin/sh

    /usr/bin/java -Xmx4096M -Xms4096M -jar craftbukkit.jar
The two mentions of 4096M simply state that the process has 4GB of memory allocated to it and a maximum of 4GB of memory. This can be adjusted based on what memory you have available. In this system, that is 16GB of memory. Once you finish the mc.sh script, make sure it is executable.
# chmod 755 mc.sh
There is one more issue. With craftbukkit.jar and really any Minecraft server, it is best to keep it running in the foreground so you can see what is happening on the server. Log messages are useful and you can directly input commands into the server. I use a wonderful tool called tmux which is similar to GNU's screen.
Although how to use tmux is beyond the scope of this article, you basically just launch it by typing tmux and then prefix commands with Ctrl-b. That's the Ctrl key on your keyboard and then type the letter b while still holding Ctrl. Release both keys and then type the letter for what command you need to run.
When you first launch tmux, you are in the 0 session. I usually reserve 0 for tasks I need to run and so want to create another session. I do this by typing Ctrl-b c. The c stands for create and so a new session is created. In this case it is the 1 session. In the 1 session, the Minecraft server can be started by:
    # cd minecraft
    # ./mc.sh
You will now see a variety of output and then the craftbukkit.jar server is fully up and running. Before we get much further, we want to add a few plugins. I now type stop at the server prompt and watch as craftbukkit.jar shuts down.
If you want to switch to another tmux session, simply type Ctrl-b and the number of the session. To go back to the 0 session, simply use Ctrl-b 0.
There should now be some additional files and directories within the minecraft directory. One of these is plugins. These are the plugins I am going to install:
    Essentials-2.9.1.zip
    Essentials-extra-2.9.1.zip
    Essentials-gm-2.9.1.zip
    Lockette160.zip
    PermissionsEx-1.19.1-package.zip
    WorldBorder.jar
    worldedit-5.3.zip
    worldguard-5.5.2.jar
The plugins that are .zip files need to be unzipped. I already had all of these in a bukkit-plugins directory so I just did:
    # cd minecraft/plugins
    # cp /root/bukkit-plugins/*.jar .
    # unzip /root/bukkit-plugins/\*.zip
Now all the plugins are in place. Now go back and restart mc.sh.
    # cd /root/minecraft
    # ./mc.sh
The final piece to this puzzle is how you detach tmux from the running terminal. Once detached, the sessions you have open in tmux continue to run in the background and can be accessed again by typing tmux attach.
In order to detach tmux, type Ctrl-b d. As you would expect, d stands for detach. Now that tmux is detached, you can logoff from the system and come back later after playing some Minecraft.
What's Next
While everything is up and running, there is still more to do to actually get all of the plugins fully up and running. As Martin and I continue through this process of understanding more about how to fully utilize these different plugins, I will write some additional articles about these plugins.
If you're curious how I came up with the list of plugins, it was originally posted on the the VillageCraft server page. The list of plugins is no longer on the information page but could probably be retrieved from a cached copy.